• Online Facilitation

    Four Steps to Get Started in the Virtual Classroom

    The need to move traditional classroom training to a live online format has never been greater. Learning how to design, deliver, and facilitate truly interactive and engaging virtual classroom training is just like learning any other new skill: it takes practice. If you are an experienced in-person trainer, think about how you learned your craft and honed it over time and how you can replicate that experience for the virtual classroom. Here are four steps to accelerate the dividends of your practice.

    STEP 1: PARTICIPATE IN TUTORIALS AND GATHER INFORMATION

    Goal: Learn About Available Features

    Almost every virtual classroom vendor offers free online tutorials. Take advantage of this resource and participate in live sessions or watch a video recording of demonstration of the features of the tool. While you’re on the vendor’s website, download tip sheets or reference guides for later use. Reviewing these documents is part of the learning process. Finally, contact your organization’s IT or training department and investigate the tools and training materials that have been developed. Once you’ve gathered this information, note your learning on the features of your virtual classroom tool, then organize and store your notes for easy access later.

    STEP 2: GET HANDS-ON EXPERIENCE

    Goal: Learn How to Use the Features

    Hands-on experience is the best way to learn any new technology. For example, when you learned how to drive a car, you probably spent some time in a classroom studying and reading about how to drive a car and learning the rules of the road. However, it was not until you started driving that you truly began acquiring driving skills. When you are ready for a test run of a virtual classroom tool, position two computers (or have a friend join you in a virtual session) side by side and log in as the instructor on one computer and as the participant on the other. As you test the tool’s features on one computer, notice how your actions as an instructor are displayed to the participant. Being able to experience these two perspectives simultaneously translates into quicker mastery of the tool and a better understanding of how to use the tool to enhance the virtual learning experience of learners.

    STEP 3: EXPERIENCE THE VIRTUAL CLASSROOM AS A LEARNER

    Goal: Reflect on Your Experience as a Virtual Classroom Learner

    Experiencing virtual classroom training as a participant can help you quickly gather ideas on do’s and don’ts. Since up for an online course, or simply join a free webinar offered by a professional associations or vendors. Nowadays there are plenty of free webinars on how to covert classroom training to live online training! Although a webinar is more of a presentation and not typically designed as interactive training, the experience of participating in several virtual sessions is still worth your time, especially if you’ve had little virtual learning experience. Use a Virtual Classroom Observation Template to capture your reflections on the virtual classes and webinars that you attend.

    STEP 4: HOLD A LOW-STAKES VIRTUAL CLASSROOM SESSION

    Goal: Begin Designing and Facilitating for Virtual Audiences

    Now that you’ve seen the “participant” side of the virtual classroom, it’s time to experience the “presenter,” or “facilitator,” side of a session. Schedule a low-stakes meeting with coworkers and prepare as if it were a high stakes session. Think creatively about your meeting and use all the appropriate features of your virtual classroom tool. For example, if the purpose of the meeting is to plan an upcoming workshop, create a poll and have participants vote on their preferred date. Or, use the whiteboard feature to assign tasks in real time to the virtual participants as you agree on roles and responsibilities for the workshop. Create a few well-designed and appealing support slides for the meeting, such as an agenda or topics with questions you want to address.

    Next, focus on facilitation techniques in a virtual setting. As you facilitate the session, consider how your audience interactions are different without access to familiar body language cues that we all use to get our message and meaning across to learners.  At the end of your low-stakes virtual session, make notes about what went smoothly and where you see room for improvement.

    In closing, the goal of becoming comfortable with a virtual classroom tool is to enable you to focus on your content when delivering training rather than on the technology. Following these four steps will put you on the right path to develop engaging and interactive sessions, and ultimately, to enhance the learning experience of your learners.

  • Online Facilitation

    ‘Mise en Place’ for the Virtual Classroom Facilitator

    Foodies and chefs will recognize the French phrase, mise en place  (pronounced MEEZ ahn plahs), which translates to “put in  place.”  In the world of cooking it means having all your ingredients prepared and ready to go before you start cooking.  It’s tempting to jump right in and turn on the stove as soon as your first few ingredients are ready to go.  But great chefs know that it pays to prepare everything in advance to prevent problems and avoid chaos in the kitchen when it’s time to put meals together.

    If you facilitate in the virtual classroom you know that there are factors that can derail session, some of which are out of the facilitator’s control, but others that a facilitator can mitigate.  One key to successful training in the virtual classroom is meticulous planning and preparation, just like the mise en place technique.

    Consider these ten things to do before you say “welcome” to your virtual audience and start your session:

    1.  View your slides in your virtual classroom tool.  Confirm that all images and text display properly and see if slide transitions work.

    2. Rehearse your session with a mock audience.  Ask them for feedback on your facilitation technique, timing and level of interactivity.

    3. Record yourself in the virtual classroom.  Listen to your voice.  Is it engaging or monotonous?  Did you vary your pace of speech?

    4. Prepare the materials that you will send to participants post-meeting. If you plan to send an online evaluation, prepare it in advance.  Or if you plan to send follow up materials, prepare an email in draft form so you can send it right away, while the course material is fresh in everyone’s mind.

    5. Send instructions to participants on how to test their computer.  Doing this in advance gives participants time to install plug-ins, deal with firewall issues or other access issues.

    6. Remind participants about the session time, day and how to access the virtual classroom.  I typically send this reminder three times:  the day the person enrolls, the day before the session and a few hours before the session begins.

    7. Develop plan B.  Think of everything that could go wrong and plan accordingly.  Have a back up computer, back up headset or phone, screen shots of any applications or websites you plan to show.  My building has bi-annual fire drills, so I’ll even go so far as to check with security to see if a fire drill is planned so I can prepare for that potential disruption.

    8. Create a list of contact names for technical support.  When you need technical assistance, speed is key.  If you have contact names ready at your fingertips, you will be one step closer to resolving the problem.

    9. Print a list of participants.  The list should contain name, photo (if available), title, location or whatever information is important to help you remember who is who.

    10.Eliminate distractions.  Close your door and put a sign on it, turn your mobile device to vibrate and turn off instant messaging tools that you will not use during your session.

    Follow these ten preparation steps to ensure your next virtual classroom training is a satisfying feast for you and your audience!

  • Online Facilitation

    Producing a Large Scale Webinar

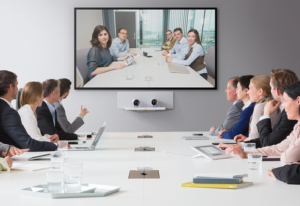
    Over the last two months I had the opportunity to work with ASTD to produce four large scale webinars that were part of the TechKnowledge 2011 Virtual Conference.  Each webinar featured a presenter who had presented a session at the actual conference, and then delivered a similar session via WebEx to a virtual audience.  Since speakers were selected based on their popularity and appeal to virtual learners, enrollment in the webinars was impressive, ranging from 500-1,000.  The webinars were interactive and used one-way audio: the audience listened through a phone line and typed questions into chat.

    The presenter tasks were:

    Presenter: Subject matter expert

    • Addressed the audience verbally by presenting his/her topic
    • Advanced slides
    • Gave verbal answers to questions posted in chat (with the help of the webinar moderator)
    • Not active in chat

    The technique we used to produce these large scale events was a two-person production team.  The purpose of the production team was to support the presenters and the audience during the live event.  The roles were divided like this:

    Technical Producer (Production Team Member #1):  Responsible for managing the webinar technology

    • Opened and closed meeting room
    • Muted and unmuted phone lines
    • Provided guidance via chat to those experiencing technical difficulties
    • Passed ‘control’ of meeting room from speaker to speaker
    • Recorded session for later posting
    • Typed comments in chat to answer logistical questions (ex: “slides will be mailed to you along with the recording”, or “dial xxx for audio”)

    Webinar Moderator (Production Team Member #2): Responsible for moderating the event

    •  Monitored questions that participants posted in chat, looking for common themes and interesting questions
    • At designated times, verbalized questions to speaker, serving as the ‘voice’ of the audience
    • Typed comments in chat to supplement speaker’s presentation such as names of books, authors or other resources

    My role was the webinar moderator.  I’ve never moderated such a large event, and I have to admit, I didn’t realize it would be such an intense experience.  With such a large audience, the sheer volume of questions was amazing.  I kept a Word document open and pasted interesting questions from the chat box into categories that corresponded to the speaker’s presentation.  As I was doing this, I also listened to see if the speaker answered any of the chat questions in the course of his or her presentation.  Some speakers glanced at the chat area and responded to random questions or comments.  Either way, if the speaker had already addressed the question, I removed it from my list.  Then, when we paused for questions, I checked my Word document and verbalized questions for the speaker to answer.

    I also listened carefully to the speaker to see if he or she mentioned any resources.  If the speaker mentioned a good book, research article or website, I typed into chat is case participants didn’t hear clearly.

    If you plan to produce a large scale webinar where you plan to interact with your audience, I highly recommend a two-person production team.  Both of us worked at break-neck speed for the duration of each webinar and neither of us could have done it alone.  Finally, if you will be the technical producer or webinar moderator for a large webinar, do as much preparation as you can to prepare for the event (testing equipment, creating back up plans, and reviewing speaker materials) and get ready for an exhilarating experience.

  • Global Virtual Training Resources,  Online Facilitation

    Recipe for success in a web conference

    What does it take to put together a successful web conference where participants and facilitators exchange valuable knowledge, are energized and hungry for more? Whether you are using web conferencing to deliver training, hold a meeting, host a knowledge sharing session or other event, there are three ingredients to consider for a successful event:

    • One part well-designed content
    • One part engaging facilitation
    • One part well-planned event management

    Let’s explore each ingredient…

    Content: The topic and content of your web conference will attract your audience to enroll in your event, so, to state the obvious, your content must be relevant for your audience. If you are converting face-to-face training to delivery via web conference, plan for about 3 hours to convert every 1 hour of material. Converting your content should include trimming your content so there’s less ‘talking to’ and more ‘interacting with’ the audience, adjusting exercises by maximizing the features available in your meeting room and adjusting your PowerPoint slides to include images that illustrate key concepts and slides that cover one key concept only.

    Facilitation: While good content will attract your audience to your online session, great online facilitation will keep them tuned into your session. A good online facilitator knows how to connect with the audience, in spite of being blind to the audience. He or she does this using a variety of techniques such as engaging the audience early and often, using clear and precise language that is free from slang, and giving the audience time to respond to verbal questions, to polls and to type responses in chat. The online facilitator is also adept at scanning their computer screen continuously to “see” what the audience is doing: are they chatting, raising a hand, have they stepped away from your screen or their desk. Needless to say, a good online facilitator is an excellent multi-tasker.

    Event management:  This ingredient is a mix of everything else that goes into web conference.  Event management begins with the initial meeting invitations, continues to the live event management and ends with follow up communications, and all of these pieces should be integrated.  Most web conferences benefit tremendously from having a second person online during the event, whose role is to manage the meeting room and support the lead facilitator.  This role, often referred to as the Producer role, helps to keep all the moving parts of a web conference in sync.  The Producer also helps participants to test their computer before the event, troubleshoots technical problems during the event and manages post event activities such as getting the web conference recording circulated to the right people.

    Mix these three ingredients together, add a twist of great internet connectivity and then toast to your success!

  • Global Virtual Training,  Online Facilitation

    The Global Virtual Classroom: Five Keys to Success

    Imagine yourself in a virtual classroom. The instructor puts an image of a game of cricket on the screen and says: “Sometimes dealing with pressures at work may feel like a game of 20/20 limited cricket where you are chasing a score of 220 and it’s the last over.  You have the best fast bowler to face and only one wicket in hand!”  If you are an American, the analogy to cricket would probably fall flat.  You wouldn’t know what the instructor was talking about.

    A scenario like this would leave learners feeling excluded and thinking virtual classroom training is not going to meet their needs.  However, when virtual classroom training includes global participants, scenarios like this happen all the time!  Here are five areas to consider when preparing for a virtual global audience as a facilitator and/or designer:

    1. Logistics: When you select the time and date for the training, keep in mind time zones, national holidays and the official work week.

    2. Content: In a physical classroom you can easily spot cultural misunderstanding — quizzical looks staring back at you – and quickly clarify.  Since the facilitator cannot make eye contact in the virtual classroom, it’s critical to comb through your materials and adjust or remove culturally inappropriate content.

    3. Learning styles: An exciting aspect of a global audience is the diversity in virtual classroom.  Match diversity with diversity by offering participants a variety of exercises and even give them the options for responding: type in chat or verbalize.  Use polls and instant feedback tools to engage participants and overcome shyness around speaking or typing in a non-native language. Remember, there is no magical solution for addressing culturally diverse learning styles.  What is important is the facilitator’s awareness of different learning styles and incorporating a range of activities to meet those diverse needs.

    4. Rehearsal: One of the easiest ways to identify and correct unsuitable content in a global training program is to rehearse with a mock audience. Include participants from the target country(s) and instruct them to listen and look for items that aren’t culturally appropriate or won’t have meaning for a global audience.

    5. Facilitation: Once you’ve adjusted your material, it’s time to think about the spoken word.  As you facilitate, use “international” English that is free from slang, idioms and references that only people from one country would understand.  In a face-to-face setting, learners can rely on body language, facial expressions and a bit of lip reading to fill in language gaps.  In a virtual classroom, these cues are limited or absent, so adjust your speech to compensate.

    By taking the participants’ perspective and making adjustments based on them you’ll make participants feel included and maximize learning transfer — regardless of their location or cultural background — and make them eager for more.

    Read the full version of this article in Training & Development Magazine (registration required).

  • Online Facilitation

    “I See What You’re Saying” – Working with Visuals in Virtual Meetings

    In this guest post, Michael Randel, Director of Randel Consulting Associates, shares a case study using a video conference and web-meeting tool to support a retreat with teams in Washington DC and DR Congo.

    Virtual meetings make it easy for people located in different places to interact with one another.  There is a trade-off though – while we gain in ease of communicating (whether through an audio-conference, a video-conference, or a live webinar), we lose the richness of the multi-dimensional feedback we use in our face-to-face interactions.

    This is changing.  No longer do we have to put up with the limited channels of communication offered by traditional virtual meetings.  We now have the ability to combine various tools to create a richer communication environment, supplementing verbal interaction with visual displays that can reflect real-time developments in meetings.

    One way of doing this is to use web-meeting tools to complement the verbal interaction.  This provides a visual display that can mimic the role of a flipchart in traditional meeting rooms, such as showing the agenda, capturing discussions and reports, and displaying plans as they are developed.  This helps equalize participation, as all participants in the meeting have the same ‘view’ of information, and increases opportunities for shaping the content of these displays.

    Read more about a case study of how we helped one client hold a team retreat, even though team members were in two locations with a six hour time difference.

    Michael Randel, is the Director of Randel Consulting Associates.  Michael, a Certified Professional Facilitator, is a learning and organizational development professional who supports the effectiveness of individuals, teams and organizations. He has worked with clients from the private, public and non-profit sectors in more than twenty countries.

    Photo Credit: Michael Randel

  • Online Facilitation

    What You Need to Know About Adobe Connect Pro Mobile

    Adobe offers one of the most sophisticated web conferencing tools in the industry, Adobe Connect Pro, so it’s not surprising that they were one of the first vendors to release an app to allow iPhone and iTouch users to participate in a web conference:  Adobe Connect Pro Mobile.  You probably know that Adobe Connect Pro runs on Flash, and Flash doesn’t display on an iPhone or iTouch.  If you’d like to know how Adobe worked around this barrier, read this article.

    I held a web conference using Adobe Connect with participants who logged into my session via iPhone users last week.  Below is a summary of how Connect works on an iPhone.

    • What’s Visible: iPhone users can see the share pod, chat pod, attendee list and camera pod (requires 4G).  The share pod and camera pod appear on different screens, while the chat pod and attendee list appear together.
    • Share pod: iPhone users can watch your slides, but they cannot see annotation tools such as the pointer or any tools in the white board overlay.  Because of this limitation with the white board overlay, it means that mobile participants will not see white board interaction. iPhone users cannot see any flash content in a share pod, such as Captivate or Presenter.  When you switch to application sharing mode, mobile participants can see the screens that you share.  Keep in mind that their screen is much smaller, but you can let them know that the pinch-zoom feature will work.
    • Chat pod: iPhone users can see one chat pod, along with the attendee list.  This feature works best if you hold the phone horizontally to make the attendee list and chat pod to appear side by side.  Connect allows the host to display multiple chat pods, however, users can only see one chat pod.
    • Limitations: iPhone users cannot see poll pods, file share pods, web links pods nor use instant feedback features (raise hand, agree, disagree, etc.).

    Mobile web conferencing is still in its infancy, and I expect the tools and the market for these products to grow.  It would certainly help for Apple to allow Flash content on Apple devices.  Just think how fun mobile web conferencing will be when participants are on tablets, like an iPad!

    For more info from the Connect User Community, check out this video and quick guide and this article from PC World.

    Since iPhones don’t display Flash, now the heated fight that is boiling over between Adobe who develops Flash and Apple, whose products don’t run flash is another story and all I can say is that I hope the two can learn to play in the sandbox together.

  • Online Facilitation

    Mobile Web Conferencing: Do’s and Don’ts

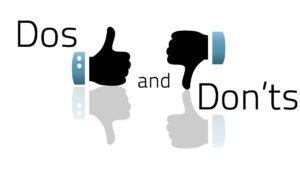
    Mobile learning is hot right now.  So hot that the E-Learning Guild devoted an entire conference to mobile learning, mLearnCon, this year which attracted hundreds.  This year, several web conferencing vendors like Adobe Connect, Cisco WebEx and Zoom have released mobile versions of their tools which allow users to participate a web conference from a mobile device.  The first devices to be supported, not surprisingly, are iPhones, and Driod phones and Blackberries are coming online quickly.

    If your web conferencing vendor supports mobile devices, and you are considering including mobile participants, here are a few items to keep in mind:

    • Don’t attempt to facilitate a session from a mobile device – for obvious reasons.  However, if you plan to include mobile participants, log into your session from a mobile device as a participant, so you can watch the mobile “view” as you facilitate.
    • If you will use a conference call for audio, make sure mobile participants know how to mute their mobile device or that you have the ability to mute participant phone lines. Imagine the sound of an ambulance or wind blowing and disrupting the audio for everyone on the call.
    • Remind mobile participants to charge their device before joining the session.
    • Don’t offer to include mobile participants if you have not tested your material on a mobile device. Test everything on a mobile device, from signing in to the end of the session so that you can see what adjustments you need to make to instructions, content, and exercises.  The full set of features available for desktop participants may not be available for mobile participants.  Case in point: in a recent webinar using Adobe Connect Pro I posted a poll asking if participants were on a desktop/laptop or mobile device.  I later realized that mobile participants cannot see polls.  No wonder 100% of the responses showed that everyone was at a desktop or laptop!
  • Online Facilitation

    Maximizing the Application Sharing Feature in a Web Conference

    Web conferencing tools like Adobe Connect, Cisco WebEx and Zoom and others allow the host to share his/her screen with the audience. When the host shares his screen it means that participants in the web conference view the host’s screen as he navigates the web or to an application such as Excel.  The host retains control of the screen and participants watch as he performs a specific task.

    Here are a few ideas to make the most of the application sharing feature in a web conference:

    • Log into an extra computer as a participant: Since the instructor view and participant view are usually different in application sharing mode, it helps to have an extra computer next to you.  Log into the extra computer as a participant so that you can glance at the participant view and make sure everything is ok.
    • Optimize your screen: Test the application sharing feature before using it in a live session and make a few changes to optimize your screen.  By optimize I mean make the screen as clear as possible for your viewers.  If you will be showing websites while in application sharing mode, remove all toolbars you don’t need.  Does the audience really need to see your bookmarks toolbar?  Better to remove all the unnecessary toolbars in your Internet browser for a cleaner look.   Also, experiment with the text size and zoom options in your browser or in the application you are sharing and see if you can make any adjustments to improve the clarity of the screen.  Check the extra computer next to you to see how the screen changes as you make adjustments.
    • Avoid ‘Antsy Mouse Syndrome’: Keep in mind that while you are sharing your screen with participants, they can see your mouse moving on the screen. A presenter suffering from antsy mouse syndrome constantly moves his mouse as he speaks which is very distracting.
    • Practice: Practice the steps you will follow when you are in application sharing mode so that they are fluid.  You want to avoid clicking around needlessly which will confuse participants.  For example, if you plan to navigate to a section of a web site that you will demonstrate, note the path you will click through in your speaker notes or leader guide.

    The application sharing feature is a powerful feature, and when used properly it can greatly enhance your web conference.

  • Online Facilitation

    What Web Conference Facilitators Can Learn From the Movies

    Many years ago, someone in the movie theater business got the great idea of showing something on the screen to entertain the audience during the lead up time to the movie start time.  This meant that those who arrived to the movie early had something to watch to entertain themselves.  Advertisers also seized on this opportunity to market to a captive audience.

    Similarly, learning professionals from CLOs to learning specialists have a captive audience during the lead up time before a web conference begins.  In order to get a web conference to start on time, you need to ask participants to arrive early.  Why not make the most of those minutes leading up to the start time of your web conference by showing pre-session slide show?  The content of the slide should be entertaining, while supporting the material you will cover in your course.  Consider including the following in the pre-session slide show:

    • Interesting statistics (for example, for a computer security course include a statistic about the amount of attempted computer hacks)
    • Famous quotes that relate to your topic (for example, for a writing course include a quote from Mark Twain or Shakespeare)
    • Quiz question followed by the answer. Just like at the movie theater, show a photo of a person or place and a simple multiple choice question.
    • Logistical information. Remind participants about materials they need to have ready, start/end time or other FAQs.
    • Marketing information. Remind participants about upcoming courses follow up seminars, etc.

    How you set up your pre-conference slide show will depend on which web conference tool you are using.  For example, with Adobe Connect you can link each slide to the next to create a loop of slides (do the linking in PowerPoint), then each participant clicks through the slides at his/her own pace.

    Each minute of a web conference is precious, so make the most of the lead up time with a pre-session slide show that peaks your audience interest and gets them into a learning mindset.  Who knows, you may find a pre-conference slide show so helpful that you include it in your face-to-face trainings as well!

    Related Resources:

    Adobe Connect

    CLO Magazine